Guava Cake Bars (Cuban Masa Real de Guayaba)
I’m sure you’ve heard me talk plenty about how much I loved going to the Cuban bakery with my mom on Saturday mornings as a kid.
We’d always get Cuban bread, ham croquetas, guava pastelitos and torticas de moron, just to name a few. Well, these guava cake bars would occasionally make an appearance and they were DELISH!
What is Masa Real?
In Spanish, these guava cake bars are called masa real (pronounced mah-sah-reh-al) which translates to “royal pastry” or “royal dough”.
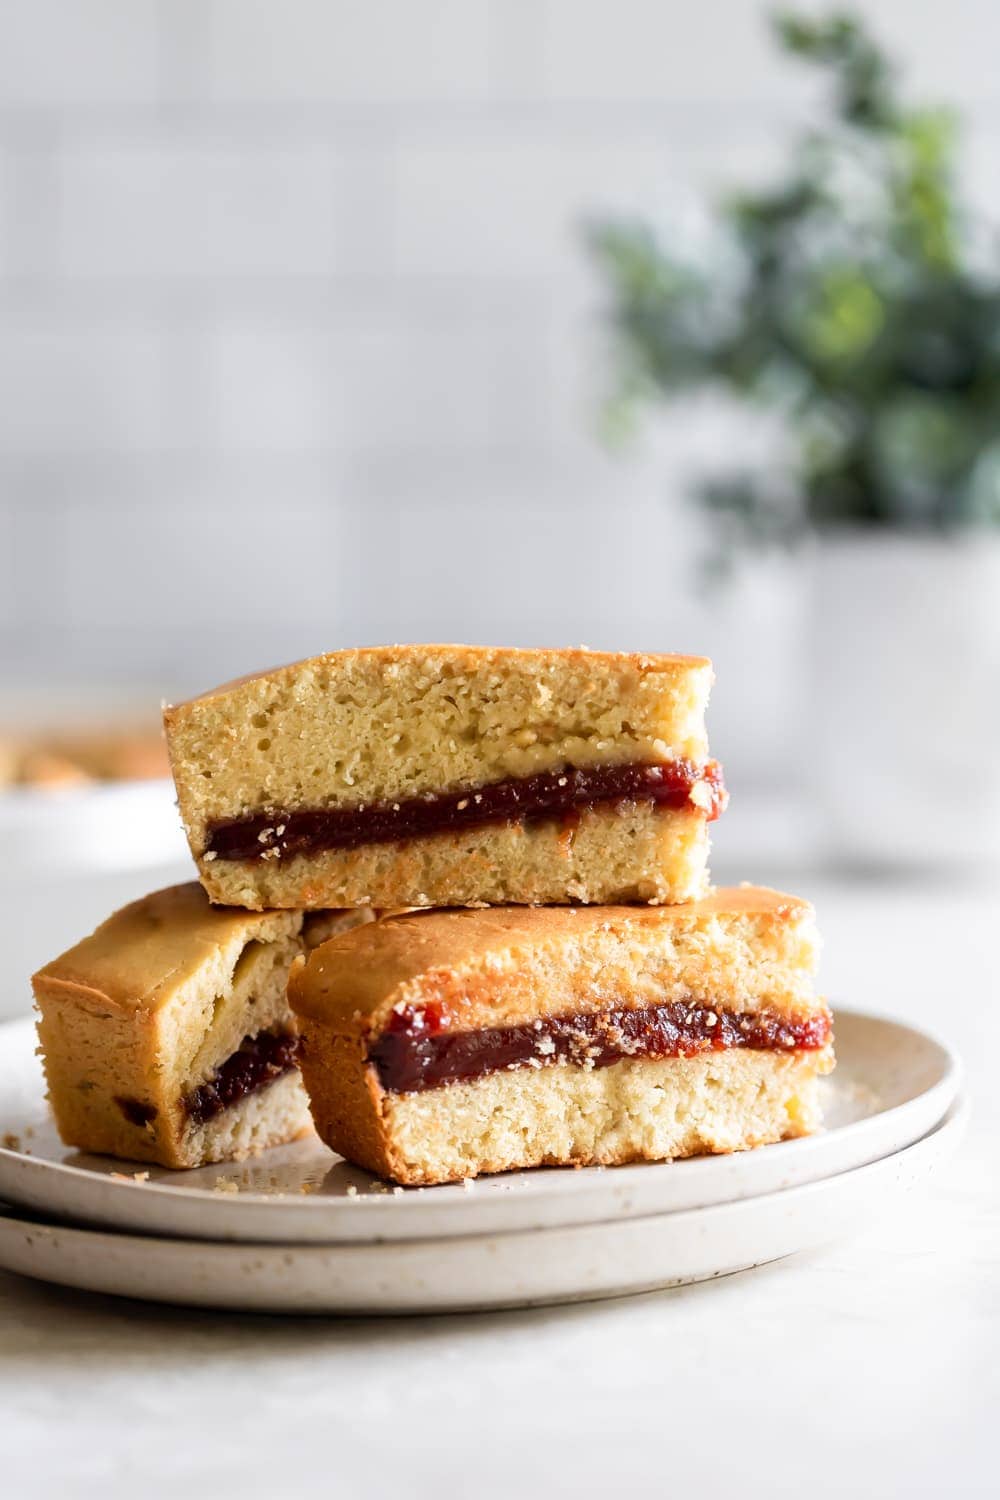
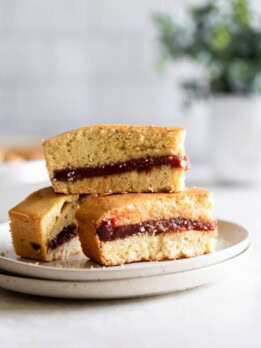
Unless you were born in a Cuban family or were brought up here in South Florida, you’re probably clueless about these cake bars. Picture this: A dense vanilla-flavored cake with rich, sweet guava in the middle.
Sounds amazing, right!?
5 Star Review
“Made these bars today and they are amazing. The recipe is easy to follow and more importantly, the bars taste delicious. Thank you for sharing this recipe!”
—Kim
Want more guava recipes? Of course you do. Make my 4-ingredient guava cheese empanadas!
Recommended For This Recipe
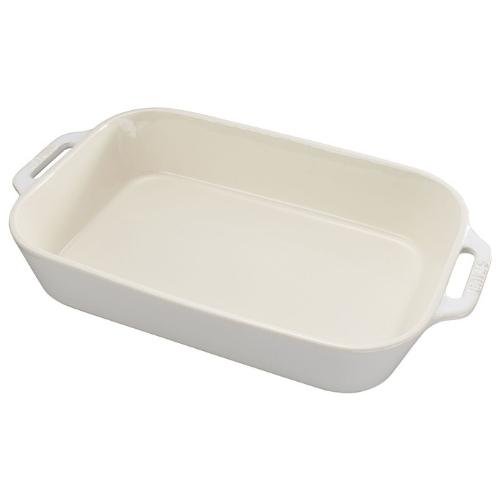
9×13 Baking Dish
This Staub casserole dish is absolutely incredible! It has a porcelain-enamel finish and is microwave/dishwasher safe!
Recipe Tips & Tricks
- Layer evenly: Make sure to spread the guava paste slices evenly over the cake batter to ensure every bite has a balanced flavor of the sweet, tart guava.
- Don’t Overmix: Mix the cake batter until just combined. Overmixing can lead to a dense and tough texture.
- Use Parchment Paper: Line your baking pan with parchment paper, leaving some overhang on the sides. This makes it easy to lift the bars out of the pan for clean slicing.
- Cool Completely: Allow the guava cake bars to cool completely in the pan before cutting. This helps them set and prevents them from falling apart.
Storage Tips
If you plan to consume the guava cake bars within a day or two, you can store them in an airtight container at room temperature.
- In the fridge: Place the cut guava cake bars in an airtight container or wrap them tightly in plastic wrap. Refrigerate for up to 5-7 days. Before serving, allow them to come to room temperature for the best flavor and texture.
- In the freezer: Wrap them individually in plastic wrap, and then place them in an airtight container or a heavy-duty freezer bag. They can be frozen for up to 2-3 months. Thaw before serving.
That’s all folks! Can’t wait for you to make these cake bars!
Guava Cake Bars (Cuban Masa Real de Guayaba)
Ingredients
- 1 cup unsalted butter, room temperature
- 1 cup granulated sugar
- 4 large eggs, room temperature
- 1 tablespoon vanilla extract
- 1/4 cup any milk
- 3 cups all-purpose flour
- 1 1/2 teaspoon baking powder
- 1 teaspoon salt
- 14 ounces guava paste, sliced 1/2 inch thick
Instructions
- Preheat oven to 350 degrees F. Spray a 9×13 baking pan with nonstick cooking spray. Set aside.
- In a large mixing bowl, cream together butter and sugar. Mix together eggs, vanilla extract, and milk then add flour, 1 cup at a time, baking powder, and salt. Mix until all is well combined. The batter should not be drippy, it will be thick yet spreadable.
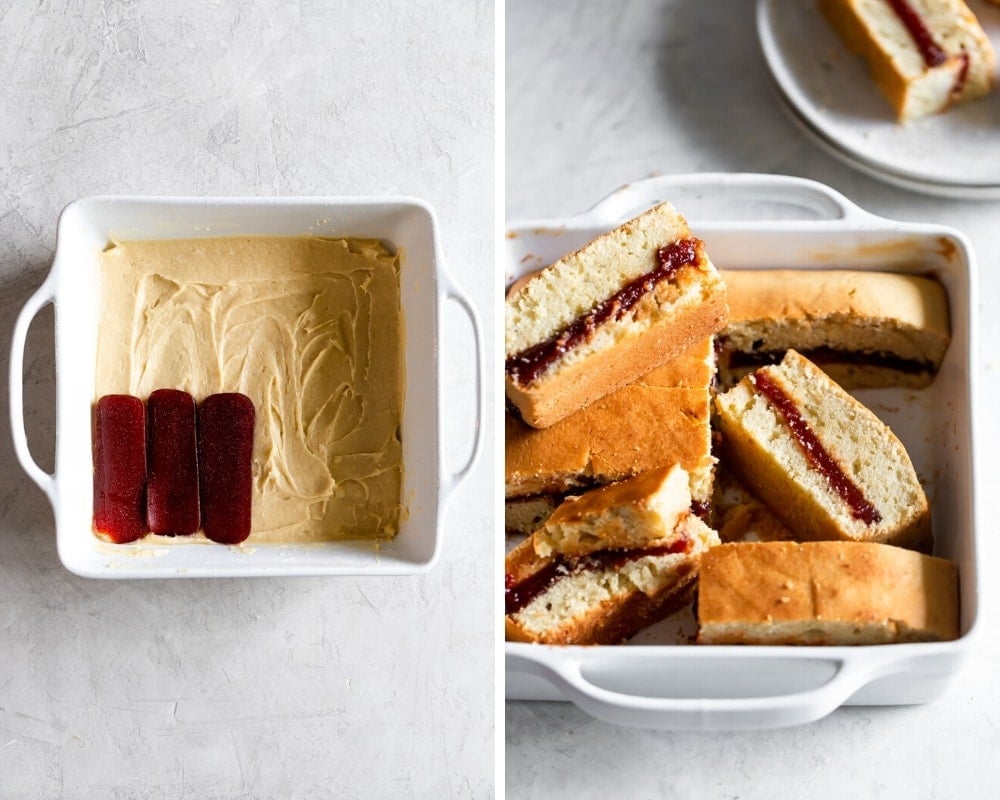
- Into the prepared baking pan, add half of the cake batter, making sure it is evenly spread across covering the entire bottom of the pan.
- Next, add the slices of guava paste on top of the cake batter in the square pan, making sure to cover the entire cake layer. Add the remaining cake batter on top of the guava slices, making sure to cover all the guava slices.
- Bake for 45-50 minutes until brown on top. Once completely cooled, cut the square cake into rectangular cake bars. Serve and enjoy!
Made these bars today and they are amazing. The recipe is easy to follow and more importantly, the bars taste delicious. Thank you for sharing this recupe!
So happy you enjoyed this recipe! :)
Hi,
The recipe says 9×13 pan, but the picture seems to show a 9×9 pan. Which one is correct?
Looks delicious!
Thank you,
njm
9×13!
So GOOD! I didn’t have enough guava so I cut it all in half and it was SO perfect! A new fave!
So happy you loved it, Sarah!!
Love your recipes!! I too grew up going to the bakery every Saturday morning with my Cuban Dad to pick up pan de Agua, y de Manteca. Pasteles de carne y guayaba. Thank you for your blog, site. It brings back sweet memories. Te deseo mucho exito😉
Gracias Isabel, thank you for your support! Enjoy the masareal! :)
Excellent recipe, thank you! I love the flavor of guava but the paste itself is SO SWEET it can be hard for me to find recipes that balance that. I absolutely loved how this came out and so did the many people I shared it with. I ran out of vanilla extract for the second time I made the recipe and substituted rum for an extra splash of Caribbean flavor and that worked very well, too.
I love this recipe. The cake has a nice flavor and I love anything guava.
First time I made it the cake batter was a little too stiff to spread so I added a little more milk until it was frosting consistency.
I am so happy I found your website Jamie. My wife and I are transplant’s from the north and are falling in love with Cuban cuisine. Thank you
So happy to hear, Ed! Thank you for your comment!